I’ve been working on some client applications that call on Lambda to do different things. In one case, the Lambda function calls an API. In the second instance, it accesses a database. In both cases, I was getting weird errors that we hard to trace down.
In the case of the database, I was returning more data than I’d asked for. Lambda was returning data from the previous query, as well as that from the current query. In the case of the API call, I had errors when I first ran it. But I fixed the error, could see the ‘good’ data, but I was still returning to the client an error message.
It took days to figure it out in the first case. I knew some sort of cacheing was going on, but I couldn’t figure out in which layer. So I put in print statements in client. Yup, the duplicates were there (obviously – that’s where I first observed them). I checked the API Gateway. Yup. Duplicates there. I checked Lambda. Dups there. I did the same query using the MongoDB interface, Compass, and received no dups. So I went back to Lambda.
Seems it was where I was instantiating the class calling the database. I was doing it outside the ‘handleRequest’ method. Why? No particular reason. Since the class had one method, I didn’t think it would make a great deal of difference. But apparently it does.
What I’m guessing is that the Lambda engine instantiates the class once for whatever period of time, and just calls the method every time an event is received. So, basically, the data I’d had returned from the database was cached in my global variable and just appended with each query.
So I changed the database client instantiation to appear inside the method, and I also made sure to close the connection at the end of the method. This is probably not the most efficient, since it does look like Lambda is creating a connection pool which, of course is also destroyed when I close the connection. I’ll need to find a better way of clearing the old results, I guess.
But it did work. No more replicated results.
I just ran into the same problem with my API caller. But, in this case, it was the errors that were accumulating. It was the same cause: I was instantiating the error array outside of the method. So I moved the instantiation inside the method and my problems disappeared.
Having this little bit of new knowledge, I will need to examine my code and put into place some best practices: what should be a global variable? what should be local? is there a way to ‘clean up’ in between that keeps the code more efficient?
AWS Lightsail is supposed to be the simple solution for getting a cloud server running – not! Well, not at least if you are trying a MEAN (MongoDB, Express, Angular, NodeJS) instance. Like with most AWS services, there is erratic documentation. And the Interverse does offer some helpful solutions. But, for me, they were sorely lacking in the detail I needed.
Mind you, when something is new, I prefer the cut and paste or monkey-see, monkey-do method of coding. After the first couple of times, when I understand how the samples work, or have modified the samples enough to fit my needs, this isn’t necessary. But, to get up and running quickly, that’s the best way to go.
I went into Lightsail assuming that yes, the hard work would be done for me and all I would have to do is set up the database, plop my code in there and – voilia! – it would work. It wasn’t quite that simple.
I am skipping a few steps in this document. I’m assuming you know how to write your Express and Angular code. I’m assuming you know how to use git. I’m assuming you know how to set up for dev and production environments. What I’m focusing on is the stuff you’ll need to do to get your app running in AWS Lightsail.
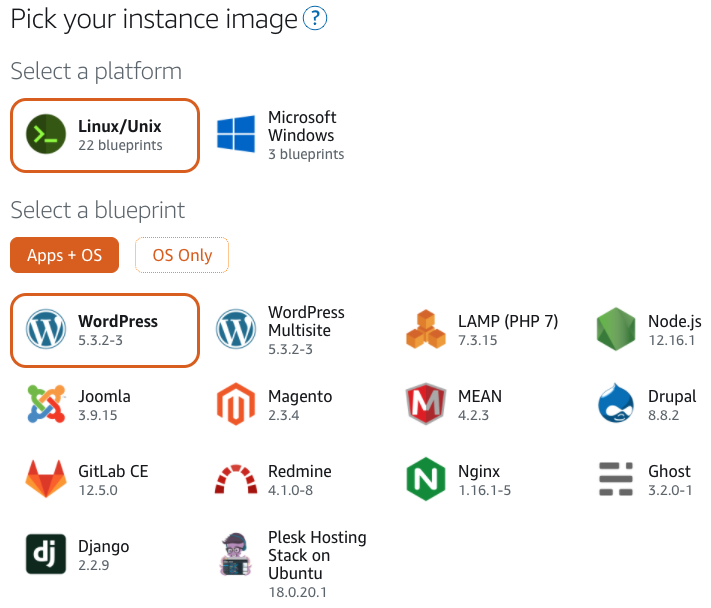
AWS Lightsail instance creation interface
When you create a MEAN stack, you get an apache instance, an instance of MongoDB on the server, and NodeJS installed. What you need to do is get your own deployable code on there, get the user on the database set up and execute your code.
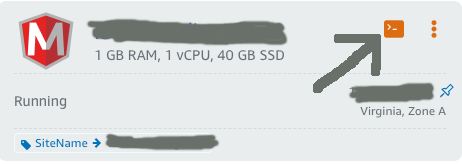
I mostly use the integrated terminal that Lightsail provides:
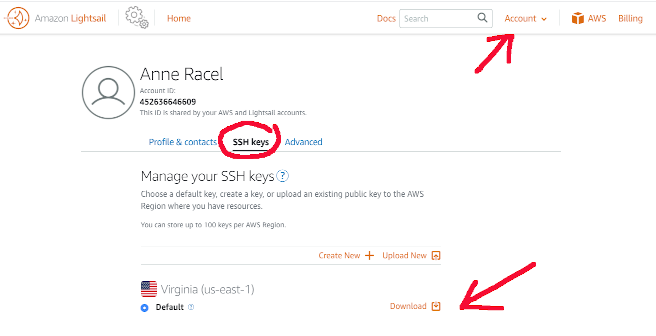
If you’d prefer to use your own terminal, you’ll need to download the .PEM file that AWS provides. To do that, click on the Account link in the upper right hand corner, click on SSH Keys, then click the download button. If there is no SSH key, you’ll need to click on Create New and follow that process.
The first thing that this YouTube video by Mike Coleman of the AWS Lightsail team suggests is changing the port that Apache is running on from 80 to something else. So I did. Problem is, when I then try running Angular from port 80, it was ‘listening’ to 127.0.0.1 not :::, so it wasn’t visible outside the box. My first suggestion, then: ignore that direction. We’ll just run our Angular code on the Apache server instead.
The first thing that this YouTube video by Aaron White suggests is creating a MongoDB user for the database your app is going to use. That was a helpful suggestion. Here’s the instructions:
mongo admin --username root --password
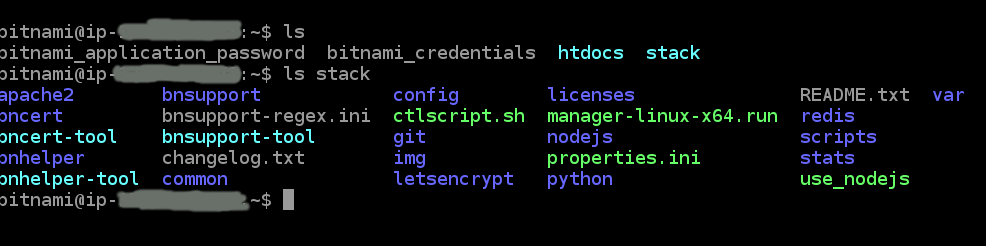
The password is found in the bitnami-application-password file.
Switch to the database you’ll be using for your application, then type the following commands, substituting your own info for my_database , myuser and mypassword:
use my_database

db.createUser({ "user": "myuser", "pwd": "mypassword", "roles":["dbOwner"]})
Mike suggests using git for getting your code on the instance. Aaron suggests Filezilla. To me, it’s cleaner and easier to use git, but your mileage may differ. Whichever you use, get your code over onto the server now. I created top-level directories for each.
Again, this is the way I proceeded at this point. Your mileage may vary.
Aaron suggested using Unix’s screen utility when deploying the application. This makes a lot of sense. That way, if you are using AWS’s web-based terminal, when the terminal disconnects, your application is still running. To do this, type screen at the prompt. It won’t look like you’re in another environment, but you’ve actually opened up a separate terminal session. Start your Express instance, then exit out of the screen session by typing ctrl+a+d. If you need to get back into that particular session, type screen -ls to see a list of running processing. Then select the process you want to resume by typing screen -r <process id>.
The is much more that you can do with screen. I would suggest checking out the documentation. Or, this site is quite helpful.
You will need to open the port on which your Express application is running. Otherwise, your Angular app can’t see it. Yeah. I would have thought that ‘localhost’ would work. But it didn’t.
So back to the web Lightsail interface. Go to your Lightsail instances and select the box showing the instance you’re working with. Click on the Networking tab. In Firewall section, click the Add Another link. Use Custom and the port number that you are using.
As a side note, this then means your Express app is wide open. So I would strongly suggest that you lock the app down to only accept requests from the local server.
Another side note: it doesn’t cost anything extra (as of this writing) to have a static IP. If you don’t have one, you could end up with a different IP for your instance any time it reboots. That means you’d have to change the whitelisting for your Express app with each reboot.
So now we have the Express app running, we’re ready to turn to the Angular one.
First off, of course, is to download all the Node modules you need. So don’t forget to run npm install --production. The flag prevents it from downloading the dev only libraries. Next, you need to compile your app: ng build --prod. But for some reason, the system can’t find ng. So I had to run the following:
./node_modules/.bin/ng build --prod
Now, back up to the top-level directory. If you do a listing, you’ll see that htdocs actually points to the htdocs directory for apache. This is where we want our Angular code to go. If you want to save the old stuff, you’ll need to move it to a separate directory. Once you do that, move your stuff in:
cp -R myprog/dist/myprog/* htdocs
Now, if everything has aligned correctly in the universe, you should be able to see your application running when you go to your assigned IP address.
On another note. For me, Lightsail is not ending up being the inexpensive option I thought it would be. I need my app to run on https. To do so, though, you need to have a load balancer attached. The cost on a load balancer? $18/month. That moves the cost from affordable to ouch! So, I’ll get this all running as an intellectual exercise. But then I think I may need to move to more affordable solution.
Amazon Web Services (AWS) documentation is voluminous. Some of it’s good; some of it’s bad. And sometimes you have to look carefully to figure out that what you’re viewing is outdated.
Thus it was when I tried to figure out how to call a Lambda service from PHP.
I had created a web service in Java that was being deployed to AWS Lambda. We had connected it to an AWS API Gateway, figuring that a web service call to the API Gateway would be the easiest way to implement a client. Not so. Not in PHP at least.
I got the service working so that I could call it from Postman. But, when I tried calling it using PHP’s cURL library, I found that trying to calculate the signature required to pass the AWS Secret Key was a headache on good days, and would drive you to drink on bad. I can’t tell you why what I tried didn’t work. I only know that I kept getting Missing Authorization errors that I couldn’t overcome and still stay sane.
So I switched to using the AWS PHP library which, I guess, I should have used in the first place. But the documentation required numerous gotos that made it confusing to follow. There were no simple examples. There were no straightforward “here’s how it should look” instructions to follow. Eventually, however, I put the pieces together. And, hopefully, you can, too.
Starting with one example, I first worked out how to get the LambdaClient object I needed.
The first task was to get the credential information. Those who have developed for AWS on their own machines may have noticed that this information is stored in an .aws subdirectory under the user’s folders. The common way of retrieving the key and secret assume access to this subdirectory. The second way this is done assumes system variables with the values. My implementation could not make use of this method. So AWS allows for custom credential objects, which is what I used:
public function getCredentials() {
   return function () {
      // Get the credential variables
      $key = AWS_KEY;
      $secret = AWS_SECRET;
      if ($key && $secret) {
         write_log('credentials created');
         return Promise\promise_for(
            new Credentials($key, $secret)
         );
      }

      $msg = 'Could not find credential variables. ';
      return new RejectedPromise(new CredentialsException($msg));
   };
}
Since this is part of a WordPress site, the AWS_ variables are stored in the wp_config file.
The documentation recommends starting with an instance of the Aws\Sdk, then creating the client from there:
… where $this->getCredentials() uses the function above.
Odd thing, though, is even after creating the client included passing credentials and location information, that was needed again when we actually made the call to the server. So I set up another function to hold that information:
Yes, I know I was inconsistent with the versions. But, for this, I wanted to make sure I was using what I had programmed to, to ensure nothing broke later.
Interesting thing was needing to encode the configuration. Makes sense, I guess, since it’s sending login information. But that wasn’t required when creating the client object.
Also note the fact that the Payload needed to be in JSON format to be sent.
The result object that I wrote to the log was interesting to see. It didn’t include the Payload, which I thought was weird. So at first, not knowing how to get the results, I tried pulling the Cloudwatch log back to see whether I could get the results that way, since I was printing them in the log. Interestingly enough, the log was base64 encoded and had to be decoded to read.
But after printing the $result->get(‘Payload’)), I was able to find the results of the call.
This is a slow call. I’m assuming that’s because this is an ‘on demand’ service. But we will be making several of these at a time so I’m hoping the successive ones will be faster.